Installation Guide
This guide walks you through installing SeaVesselManager on Windows, macOS, or Linux. Everything runs inside Docker containers — one command does it all.
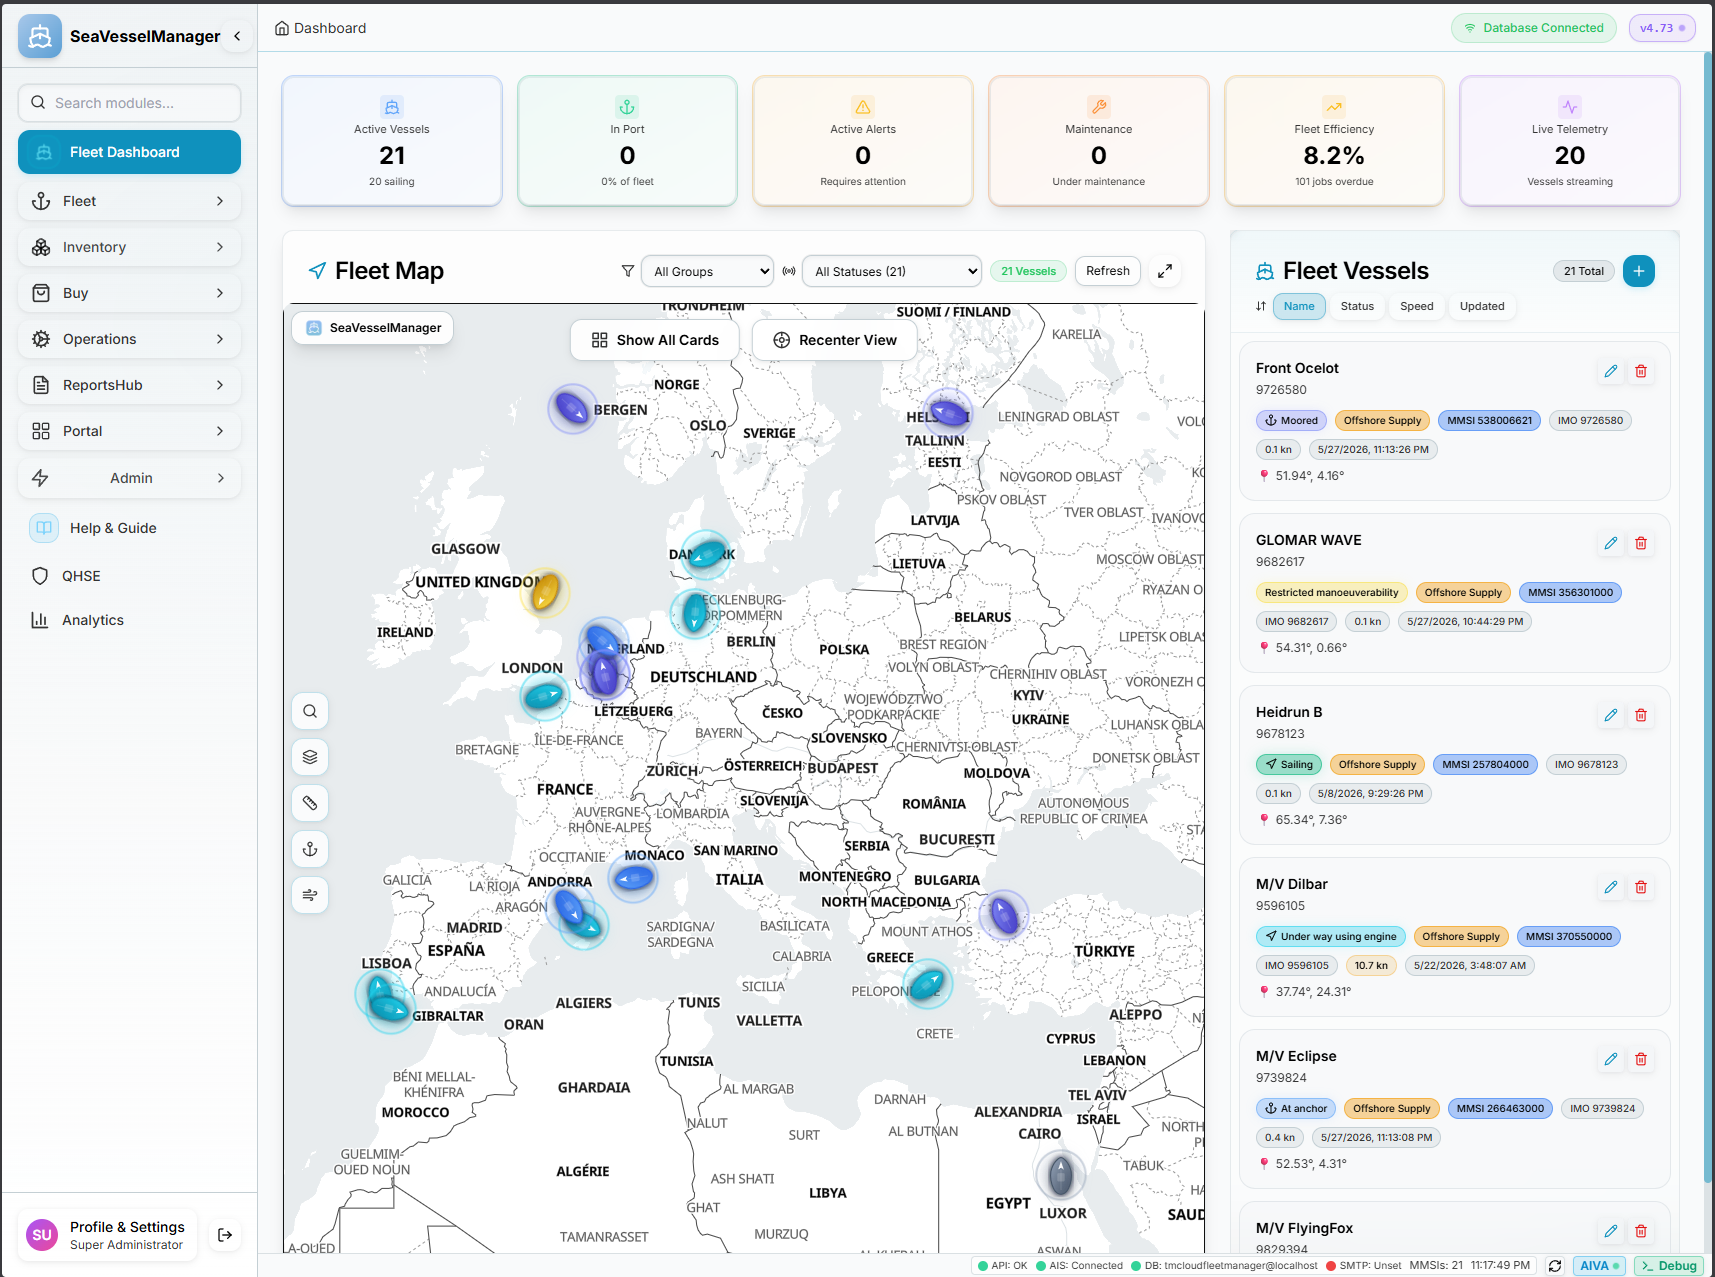
What gets installed
| Component | Port | What it does |
|---|---|---|
| PostgreSQL 17 | Internal | Database — stores all your data |
| Redis | Internal | Caching and real-time events |
| Backend API | 4001 | The REST API your app communicates with |
| Frontend | 3000 | The web application users open in a browser |
| Admin Panel | 8080 | Server status and QR-code onboarding |
Choose your platform
Before You Start
System requirements
| Requirement | Minimum | Notes |
|---|---|---|
| Docker Desktop | Version 24+ | Free for personal & small team use. Engine must be running. |
| RAM | 2 GB free | 4 GB recommended |
| Disk | 5 GB free | Docker images + database |
| Ports | 3000, 4001, 8080 | Must be free on host machine |
- Go to docker.com/products/docker-desktop
- Click Download for Windows and run the installer
- Launch Docker Desktop from the Start menu
- Wait for the whale icon to show "Engine running"
- Verify:
docker --version
- Go to docker.com/products/docker-desktop
- Download for Apple Silicon (M1/M2/M3/M4) or Intel
- Open the
.dmgand drag Docker to Applications - Launch Docker and wait for the whale icon in the menu bar to stop animating
curl -fsSL https://get.docker.com | sh
sudo usermod -aG docker $USER
newgrp dockerVerify: docker --version and docker compose version
Install on Windows
Open PowerShell as Administrator
Press Win + X and choose Terminal (Admin) or Windows PowerShell (Admin).
Run the installer
Paste this command and press Enter:
irm https://seavesselmanager.com/install.ps1 | iexDownloading SeaVesselManager v4.84...
✓ Downloaded svm-server-package-v4.84.zip (18 MB)
Extracting to C:\SVM\Server...
✓ Extraction complete
Starting setup wizard...
Answer the setup questions
Press Enter to accept all defaults, or type a custom value:
Server LAN IP [auto-detected: 192.168.1.100]: ▮
Deployment mode (vessel/office/cloud) [vessel]: vessel
Server name [SeaVesselManager]: MV Arctic Star
API port [4001]: ▮
Frontend port [3000]: ▮
✓ Configuration saved to .env
| Question | What to enter |
|---|---|
| Server LAN IP | Press Enter — auto-detected |
| Deployment mode | vessel (on-board) or office |
| Server name | A recognisable name, e.g. MV Arctic Star |
| All ports | Press Enter for defaults (3000, 4001, 8080) |
Wait for Docker to pull images
First run downloads ~500 MB of Docker images. Takes 3–5 minutes.
17-alpine: ███████████████▒▒▒ 78% 89.2MB/112MB
Pulling sin92gh/seavesselmanager-backend:latest...
latest: ███████████████████▒ 95% 287MB/302MB
Pulling sin92gh/seavesselmanager-frontend:latest...
latest: ███▒▒▒▒▒▒▒▒▒▒▒▒▒▒▒▒▒ 18% 22MB/124MB
This may take a few minutes...
Open the web app
When setup completes, open your browser and go to http://localhost:3000
Log in with superadmin / superadmin. Change the password immediately.
Managing the server
cd C:\SVM\Server

docker ps                                    # check all 5 containers are running
docker compose up -d                         # start
docker compose down                          # stop
docker logs svm-server-backend --tail 50     # view backend logs
Updating to a new version
SeaVesselManager ships new versions through Docker Hub. The customer package pins a specific version in docker-compose.yml, so docker compose pull on its own keeps re-pulling that same version. Bump the pinned tag first:
cd C:\SVM\Server
# 1. Back up, then bump the pinned image tags (PowerShell)
Copy-Item docker-compose.yml docker-compose.yml.bak
(Get-Content docker-compose.yml) -replace ':v4\.84',':v4.85' -replace 'APP_VERSION=v?4\.84','APP_VERSION=4.85' | Set-Content docker-compose.yml
# 2. Confirm the new tags
Select-String -Path docker-compose.yml -Pattern 'image:|APP_VERSION'
# 3. Pull the new images and recreate
docker compose pull
docker compose up -d --force-recreate backend frontend
docker compose logs -f backend
# Watch for: "Nest application successfully started", then Ctrl+CInstall on macOS
Open Terminal
Press Cmd + Space, type Terminal, press Enter.
Run the installer
curl -fsSL https://seavesselmanager.com/install.sh | bash⚓ SeaVesselManager Installer
✓ Docker Engine detected (version 27.2)
Downloading package v4.84...
✓ Extracting to /opt/seavesselmanager
Starting setup wizard...
Answer the setup questions
Deployment mode (vessel/office/cloud) [vessel]: office
Server name [SeaVesselManager]: Office Server
API port [4001]: ▮
✓ Configuration saved
✓ Docker containers started
🚀 Open http://localhost:3000 to get started
Open the web app
Open Safari or Chrome and go to http://localhost:3000
Managing the server
cd /opt/seavesselmanager
docker ps
docker compose up -d
docker compose down
docker logs svm-server-backend --tail 50
Updating to a new version
SeaVesselManager ships new versions through Docker Hub. To update an existing install:
:v4.84) in docker-compose.yml, so docker compose pull alone keeps re-pulling that same old version. Bump the pinned tag first.cd /opt/seavesselmanager # or wherever docker-compose.yml lives
# 1. Back up, then bump the pinned image tags to the new version
cp docker-compose.yml docker-compose.yml.bak
sed -i 's/:v4\.84/:v4.85/g; s/APP_VERSION=v\?4\.84/APP_VERSION=4.85/g' docker-compose.yml
# 2. Confirm the new tags
grep -nE 'image:|APP_VERSION' docker-compose.yml
# 3. Pull the new images and recreate
docker compose pull
docker compose up -d --force-recreate backend frontend
docker compose logs -f backend
# Watch for: "Nest application successfully started", then Ctrl+CTip: swap v4.84/v4.85 for your current and target versions. To always track the newest build, set the tags to :latest and just run docker compose pull && docker compose up -d.
Install on Linux / VPS
Install Docker (skip if already installed)
curl -fsSL https://get.docker.com | sh
sudo usermod -aG docker $USER
newgrp dockerRun the installer
curl -fsSL https://seavesselmanager.com/install.sh | bash⚓ SeaVesselManager Installer for Linux
✓ Docker Engine 27.2 detected
✓ Docker Compose 2.29 detected
Downloading package v4.84...
✓ Extracted to /opt/seavesselmanager
Server public IP [auto: 45.92.11.55]: ▮
Deployment mode [cloud]: ▮
✓ Containers started. All 5 healthy.
🚀 http://45.92.11.55:3000
Open firewall ports
If you are using a cloud VPS (Hetzner, DigitalOcean, AWS, etc.), open ports 3000, 4001, and 8080 in the cloud firewall dashboard first. That's what actually controls traffic.
If you also have a local firewall (ufw) on the server:
sudo ufw allow 3000/tcp
sudo ufw allow 4001/tcp
sudo ufw allow 8080/tcpufw installed. If you get ufw: command not found, just skip it — the cloud firewall is what matters.Access the web app
http://<YOUR_SERVER_IP>:3000Log in with superadmin / superadmin. Change the password immediately.
Managing the server
cd /opt/seavesselmanager
docker ps
docker compose up -d
docker compose down
docker logs svm-server-backend --tail 50
Updating to a new version
SeaVesselManager ships new versions through Docker Hub. To update an existing install:
:v4.84) in docker-compose.yml, so docker compose pull alone keeps re-pulling that same old version. Bump the pinned tag first.cd /opt/seavesselmanager # or wherever docker-compose.yml lives
# 1. Back up, then bump the pinned image tags to the new version
cp docker-compose.yml docker-compose.yml.bak
sed -i 's/:v4\.84/:v4.85/g; s/APP_VERSION=v\?4\.84/APP_VERSION=4.85/g' docker-compose.yml
# 2. Confirm the new tags
grep -nE 'image:|APP_VERSION' docker-compose.yml
# 3. Pull the new images and recreate
docker compose pull
docker compose up -d --force-recreate backend frontend
docker compose logs -f backend
# Watch for: "Nest application successfully started", then Ctrl+CTip: swap v4.84/v4.85 for your current and target versions. To always track the newest build, set the tags to :latest and just run docker compose pull && docker compose up -d.
Connect a Domain & Enable HTTPS
By default the app runs over plain HTTP on port 3000. To serve it on your own
domain with a valid certificate (e.g. https://fleet.yourcompany.com),
SeaVesselManager ships a built-in Caddy reverse proxy that obtains
and auto-renews a free Let's Encrypt certificate — no NGINX or Certbot needed.
Point your domain at the server
In your registrar's DNS settings, add an A-record pointing at the server's public IP:
| Type | Host / Name | Value |
|---|---|---|
| A | @ (root) | your.server.ip |
Example (STRATO): Domains → DNS → A-Record → manage, set host @ to your server IP, then save. GoDaddy, Namecheap and Cloudflare are similar.
nslookup yourdomain.com — it should return your server IP before you continue.Open ports 80 and 443 in your cloud firewall
Caddy needs port 80 (certificate challenge) and 443 (HTTPS) reachable from the internet.
- Hetzner / DigitalOcean / AWS / GCP: Open ports 80 and 443 in the cloud firewall (web console), not just on the server itself.
- If you also run ufw on the server:
sudo ufw allow 80/tcp && sudo ufw allow 443/tcp
Enable HTTPS
Option A — during setup: when you run the installer, enter your domain at the "Public domain for HTTPS" prompt. The setup script handles everything automatically.
Option B — manually on an existing install:
cd /opt/seavesselmanager/reverse-proxy # Linux
# C:\SVM\Server\reverse-proxy # Windows PowerShellNow create the Caddy .env file. Important: the file must start with SITE_ADDRESS= followed by just the domain name. No https://, no trailing slash.
echo "https://donto.space/" > .envRight:
echo "SITE_ADDRESS=donto.space" > .env# Linux / macOS
echo "SITE_ADDRESS=yourdomain.com" > .env
# Windows PowerShell
"SITE_ADDRESS=yourdomain.com" | Set-Content -Path .env -Encoding UTF8The Caddy config automatically rewrites /license/* to /api/v1/license/* so license activation works through the HTTPS proxy. This is handled automatically — no extra steps needed.
Start Caddy:
docker compose -f docker-compose.caddy.yml up -d
docker logs -f svm-server-caddyWatch the logs. Within 30–60 seconds you should see:
✓ certificate obtained successfully
https://yourdomain.com is live
required variable SITE_ADDRESS is missing a value, you wrote the .env file incorrectly. Delete it and recreate with the exact format shown above.Lock down the raw ports (required)
After HTTPS works, block direct access to the raw IP and ports. Otherwise http://YOUR_IP:3000 still works and bypasses your certificate.
Caddy reaches the containers through an internal Docker network, so you can safely bind the ports to 127.0.0.1 (localhost) only.
Linux / macOS:
sed on YAML files. sed is a text replacer, not a YAML parser. It corrupts indentation and quotes, producing errors like services.frontend.ports must be a array. Use Python (shown below) which understands the file structure.cd /opt/seavesselmanager
python3 << 'PYEOF'
import yaml
with open("docker-compose.yml") as f:
data = yaml.safe_load(f)
data["services"]["frontend"]["ports"] = ["127.0.0.1:${FRONTEND_PORT:-3000}:3000"]
data["services"]["backend"]["ports"] = ["127.0.0.1:${API_PORT:-4001}:4001"]
with open("docker-compose.yml", "w") as f:
yaml.dump(data, f, default_flow_style=False, sort_keys=False)
print("Done. Ports bound to localhost only.")
PYEOF
# Apply (postgres/redis untouched, data stays intact)
docker compose up -d
# Verify - backend/frontend should now show 127.0.0.1:... not 0.0.0.0:
docker ps --format "table {{.Names}}\t{{.Ports}}"Windows:
cd C:\SVM\Server
# 1. Open docker-compose.yml in Notepad
notepad docker-compose.yml
# 2. Find these two lines and add 127.0.0.1: in front:
# Before: - "${API_PORT:-4001}:4001"
# After: - "127.0.0.1:${API_PORT:-4001}:4001"
#
# Before: - "${FRONTEND_PORT:-3000}:3000"
# After: - "127.0.0.1:${FRONTEND_PORT:-3000}:3000"
# 3. Save and restart
docker compose up -d
# 4. Verify
docker ps --format "table {{.Names}}\t{{.Ports}}"https://yourdomain.com. The raw IP on port 3000 will refuse connections.Test everything
| Test | Expected result |
|---|---|
Open https://yourdomain.com | Login page loads, padlock icon in browser |
Open http://YOUR_IP:3000 | Connection refused (port is localhost-only) |
Open https://yourdomain.com/api/v1/health | JSON response with "status":"ok" |
Open https://yourdomain.com/license/status | JSON response with "mode":"licensed" (or "trial") |
Common mistakes
echo "https://donto.space/" > .envFix: Must include
SITE_ADDRESS= and no protocol or slash: SITE_ADDRESS=donto.spaceFix: Caddy needs ports 80 and 443. Port 80 is used for the Let's Encrypt challenge even though all traffic goes to 443.
Fix: Add
127.0.0.1: prefix in docker-compose.yml so http://IP:3000 no longer works.Fix: Run
nslookup yourdomain.com on your local machine. If it doesn't return your server IP, wait and try again.Fix: The built-in Caddy config handles this automatically. If you use your own NGINX, add
location /license/ { proxy_pass http://127.0.0.1:4001/api/v1/license/; } so the /license/* path reaches the backend.Troubleshooting
- Cert request hangs or fails — DNS not propagated yet, or port 80 blocked. Check
nslookupand the firewall, thendocker compose -f docker-compose.caddy.yml restart. - Browser still shows insecure / old page — hard-refresh (Ctrl/Cmd+Shift+R) to clear the cached service worker.
SITE_ADDRESS is missing a value— You forgotSITE_ADDRESS=in the.envfile. Delete and recreate it exactly as shown in Step 3.
If you prefer your own NGINX, proxy the domain to the frontend and API (skip the built-in Caddy):
sudo apt-get install -y nginx certbot python3-certbot-nginxserver {
listen 80;
server_name yourdomain.com;
location /api/ { proxy_pass http://127.0.0.1:4001; client_max_body_size 50M; }
location /socket.io/ { proxy_pass http://127.0.0.1:4001; proxy_http_version 1.1; proxy_set_header Upgrade $http_upgrade; proxy_set_header Connection 'upgrade'; }
location /license/ { proxy_pass http://127.0.0.1:4001/api/v1/license/; }
location / { proxy_pass http://127.0.0.1:3000; proxy_set_header Host $host; }
}
sudo ln -s /etc/nginx/sites-available/seavesselmanager /etc/nginx/sites-enabled/
sudo nginx -t && sudo systemctl reload nginx
sudo certbot --nginx -d yourdomain.com
Desktop Client
What is the Desktop Client?
The SeaVesselManager Desktop Client is a native Tauri 2 application that wraps the full web interface in a native window. It connects to any running SeaVesselManager server on your LAN or internet — no browser, no Docker, no installation of any server components on the client machine.
Windows
Windows 10 / 11.exe installer — ~35 MB
macOS
Intel + Apple Silicon (universal).dmg — ~40 MB
No Docker required
Docker only needs to run on the server machine, not on every crew member’s laptop.
Connects to any server
LAN address, domain name, or VPN — any reachable SeaVesselManager server works.
How it will work
Download & install
Run the .exe (Windows) or open the .dmg (macOS). No admin rights or Docker needed on the client.
Enter your server URL
Enter the API address of your server, e.g. http://192.168.1.100:4001/api/v1. You can also scan the QR code from the Admin Panel at :8080.
Log in with your account
Use your normal SeaVesselManager username and password. The session is stored securely on your device.
Full access — native experience
The entire SeaVesselManager interface runs inside the app. All modules, work orders, spare parts, QHSE, and AIVA work exactly as in the browser version.
First Steps After Install
Change the default password
Go to Settings → Profile and set a strong password.
Add your first vessel
Click Fleet → Add Vessel.
Create users
Go to Admin → Users → New User.
| Role | Access |
|---|---|
superadmin | Full system access |
admin | Manage vessels and data |
user | Day-to-day operations |
Register your license
SeaVesselManager includes a 30-day free trial. After the trial, go to Settings → License to activate your key.
Updating SeaVesselManager
Windows
:v4.84) in docker-compose.yml, so docker compose pull alone keeps re-pulling that same old version. Bump the pinned tag first.cd C:\SVM\Server
# 1. Back up, then bump the pinned image tags (PowerShell)
Copy-Item docker-compose.yml docker-compose.yml.bak
(Get-Content docker-compose.yml) -replace ':v4\.84',':v4.85' -replace 'APP_VERSION=v?4\.84','APP_VERSION=4.85' | Set-Content docker-compose.yml
# 2. Confirm the new tags
Select-String -Path docker-compose.yml -Pattern 'image:|APP_VERSION'
# 3. Pull the new images and recreate
docker compose pull
docker compose up -d --force-recreate backend frontend
docker compose logs -f backend
# Watch for: "Nest application successfully started", then Ctrl+CmacOS / Linux
:v4.84) in docker-compose.yml, so docker compose pull alone keeps re-pulling that same old version. Bump the pinned tag first.cd /opt/seavesselmanager # or wherever docker-compose.yml lives
# 1. Back up, then bump the pinned image tags to the new version
cp docker-compose.yml docker-compose.yml.bak
sed -i 's/:v4\.84/:v4.85/g; s/APP_VERSION=v\?4\.84/APP_VERSION=4.85/g' docker-compose.yml
# 2. Confirm the new tags
grep -nE 'image:|APP_VERSION' docker-compose.yml
# 3. Pull the new images and recreate
docker compose pull
docker compose up -d --force-recreate backend frontend
docker compose logs -f backend
# Watch for: "Nest application successfully started", then Ctrl+CTip: swap v4.84/v4.85 for your current and target versions. To always track the newest build, set the tags to :latest and just run docker compose pull && docker compose up -d.
docker compose up -d --force-recreate after pulling — a plain docker compose restart does not pick up new images, and docker compose up -d alone may keep the old containers running if compose detects no config change.What each step does
| Command | What happens |
|---|---|
docker compose pull | Downloads the new backend and frontend images from Docker Hub |
docker compose up -d --force-recreate backend frontend | Stops the old containers and starts new ones from the pulled images. Postgres and Redis are skipped — your data is safe. |
docker compose logs -f backend | Streams the backend startup log so you can confirm it boots cleanly with no migration errors |
Verify the new version
curl http://localhost:4001/api/v1/healthThe response includes the running version number.
Backup & Restore
Windows
docker exec svm-server-postgres pg_dump -U svm seavesselmanager > C:\SVM\Server\backups\backup.sqlmacOS / Linux
cd /opt/seavesselmanager
./backup.sh
Restore
./restore.sh backups/svm-backup-20260501.sql.gzTroubleshooting
- Run
docker ps— should show 5 containers - Try
http://localhost:3000first - Check firewall: ports 3000 and 4001 must be open
- View logs:
docker logs svm-server-frontend --tail 30
The database schema was not created yet. Restart the backend:
docker restart svm-server-backend- Make sure
SERVER_IPin.envis the machine's LAN IP, not127.0.0.1 - Windows: Allow inbound on ports 3000 and 4001 in Windows Defender Firewall
- Linux:
sudo ufw allow 3000/tcp
wsl --install
wsl --set-default-version 2
Then restart Docker Desktop.
docker compose down -v
docker compose up -d
Quick Reference
Default login
| Field | Value |
|---|---|
| Username | superadmin |
| Password | superadmin — change immediately |
URLs
| Address | What it is |
|---|---|
http://localhost:3000 | Web application |
http://localhost:4001/api/v1 | REST API |
http://localhost:4001/api/docs | Swagger docs |
http://localhost:8080 | Admin panel / QR code |
Essential commands
docker ps                                     # check 5 containers running
docker logs svm-server-backend --tail 50      # backend logs
docker restart svm-server-backend             # restart backend only
docker compose down                           # stop all
docker compose up -d                          # start all
docker compose pull; docker compose up -d     # update (Windows PS)
docker compose pull && docker compose up -d   # update (macOS/Linux)
Install paths
| Platform | Path |
|---|---|
| Windows | C:\SVM\Server |
| macOS / Linux | /opt/seavesselmanager |